The trank is the largest piece of the glove and covers most of your hand. It folds over allowing a seam on the outside of the hand and a fold on the thumb side of your hand. You must carefully place the location the thumb. The piece that provides the stall for the thumb is a separate piece of the pattern. The placement of the thumb determines the comfort of the glove. The trank includes the front and back piece of the fingers. The sides of the fingers come from the forchette, the ‘V’ shaped piece which you sew into the trank. If you prefer the 'U' shaped forchette the concept is the same.
Recommended steps of glove construction:
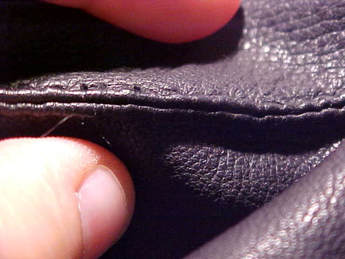
Step 1. Sew the seam on the outside of the hand from the cuff up to the top of the pinky finger over the top of the finger.
Step 2. Sew in the forchette between the pinky and the ring fingers. Start on the palm side of the hand and work you way up to the top of the finger then turn and go down the finger.
Step 3. Sew in the forchette between the ring and index fingers.
Step 4. Sew in the forchette between the index and pointer finger.
Step 5. Tack in the Thumb piece (see the following instructions.
Step 6. Sew in the Thumb
Step 7. Attach the cuff (if done separately)
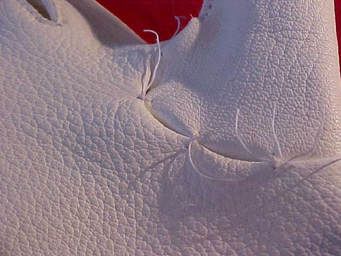
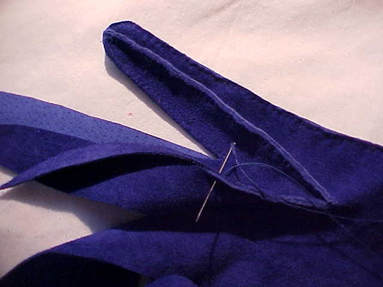
Sewing in the thumb – Sew the seam of the thumb stall. If you decided to have the seam on the inside, be sure to invert the leather before you continue to sew. Before you sew the thumb into the trank permanently, you will place the thumb piece in the hole and tack it in place. This will help tremendously when you sew the final seam.
The thumb should not stick out the side of the glove. If you look at a side view of your hand, you’ll notice that the thumb doesn’t stick out the side of your hand so you want to place it the same way in the glove. Place folded leather together as illustrated in the pictures. To tack the thumb in place, fit the thumb piece so the thumb stall is about ¼ “ toward the palm with the point fitting in the ‘V’ point of the thumb.
To tack in place sew a double round stitch every 1 1/2 inches as indicated in the picture. You will remove this tack stitch when you sew the thumb in place permanently. Use the prix stitch when sewing the thumb in place. Starting at one side of the thumb stall and continue around until you’re back at the starting point fitting in the loose leather that’s part of the thumb pattern, adjusting it to the size of the hole. There will be excess that you will cut off after you have completed the final stitching of the thumb.